Showing posts with label DVD. Show all posts

Monday, January 16, 2017

Rip and copy DVD to VLC on Mac OS X

How to rip and copy DVD to VLC on Mac OS X is an everlasting and hot issue in all relevant digital copy, video conversion forums and bulletins. Backing up DVD to VLC means that you can enjoy your favorite DVD videos on computer conveniently and can protect your physical DVD disc from scratching. That’s why many people choose to transfer DVD to VLC on Mac OS X. Here, this article will show you two methods to play DVD on VLC: Method one, rip DVD with VLC on Mac OS X; Method two, copy DVD to VLC with VLC Alternative on Mac OS X.

Method one: How to rip DVD with VLC Media Player on Mac OS X El Capitan?

VLC is not just a media player. It allows you to rip your DVD as well. Here we will show you how to rip DVD movies with VLC. (Note : This tutorial is written for VLC 0.9.6 and up).
Step 1: Start up VLC on Mac and load up DVD video. Under “Media”, click on “Convert/Save”
Step 2: When Open Media window appears, click DVD tab and browse the Disc device to make sure the field is pointing to the optical drive. Then navigate to “Convert/Save’

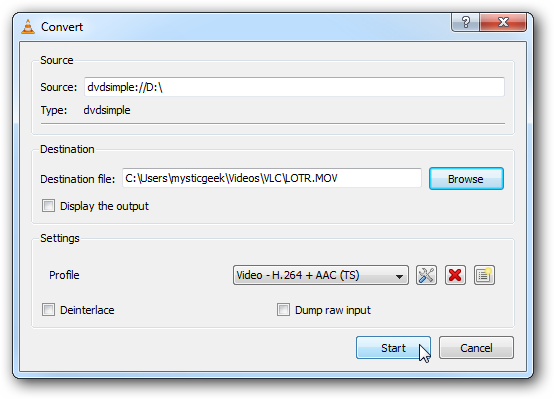
Step 3: Next the Convert screen opens where you can select a location for the ripped file.


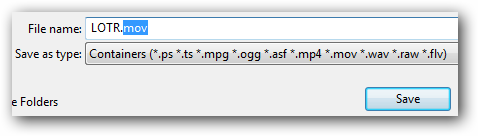
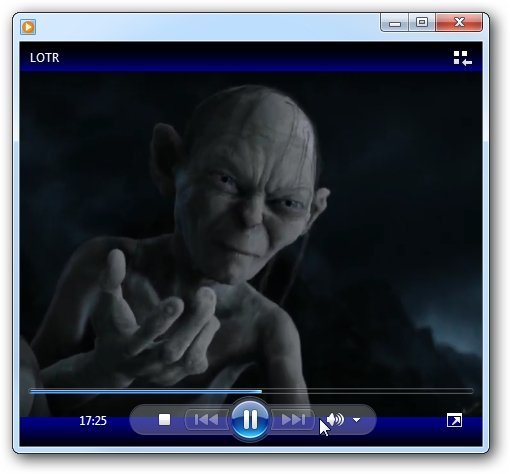
Step 4: Give the file a name and a supported extension. For this example we ripped Lord of the Rings and gave it a MOV extension. If you don’t label it with a supported file extension it will default to .ps (Program Stream) file.

Step 5: When all settings are done, the Convert screen will look something like this where we have the source drive and destination file with appropriate extension.

Finally, You should be able to play the converted file with other media players assuming you have the right codec.

Using VLC to rip DVD on Mac OS X takes too much time. And you will notice the converted movie in lower quality compared to the original. Also, VLC does not support the DVD with internal encryption so that it can’t recognize protected DVD well and fail to extract movies from DVD successfully. In this case, you have to turn your eyes to VLC Alternative to solve the problem.

Method two: How to copy DVD to VLC with VLC Alternative on Mac OS X El Capitan?

Pavtube DVDAid for Mac is recommended as VLC Altenative, which can 1:1 backup DVD protected without lossless quality. It enables you to rip DVD to VLC on Mac OS X El Capitan in H.265, M3U8,VOB, MP4, MKV, MOV, AVI, DivX, etc, at fast speed. Not like VLC, it continuously upgrades with new decryption technology for new released DVD. And it can support the newest Mac OS X system, like El Capitan, Yosemite 10.10/10.9.

Free Download and Install DVD Ripper for Mac OS X El Capitan


How to rip DVD to VOB for VLC on Mac OS X El Capitan


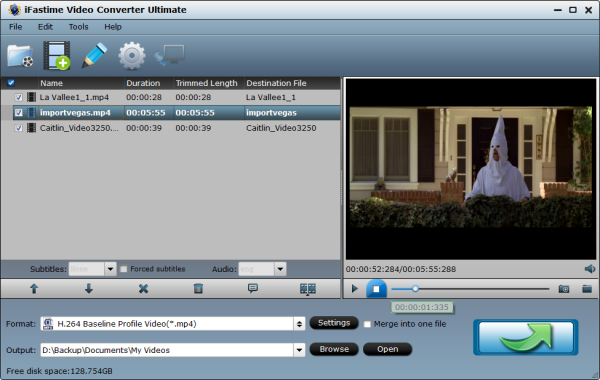
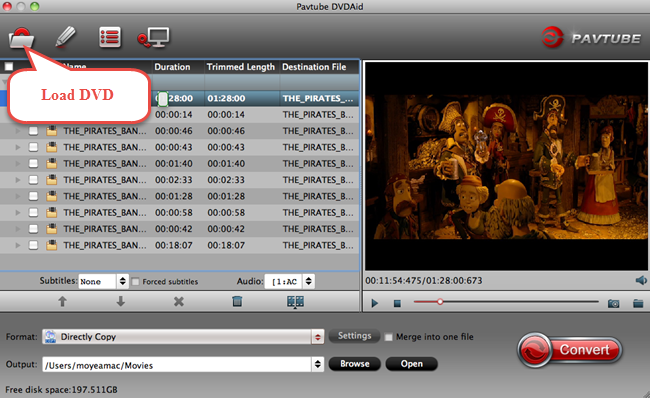
Step 1. Import DVD to the app

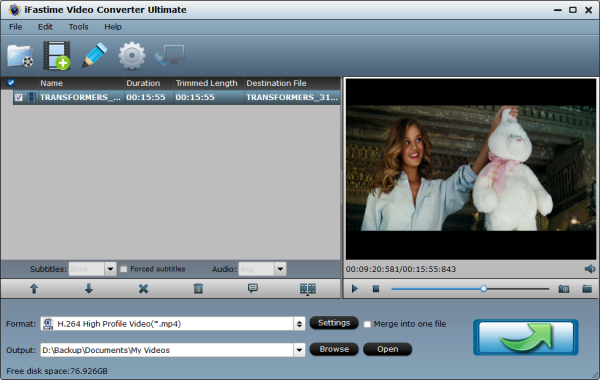
Run Pavtube DVDAid on your Mac, and load your DVD disc by clicking the “File” icon and this process only takes you a few seconds.

Step 2. Copy DVD main movie

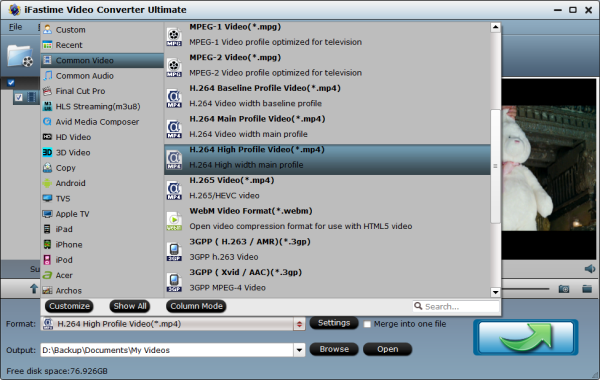
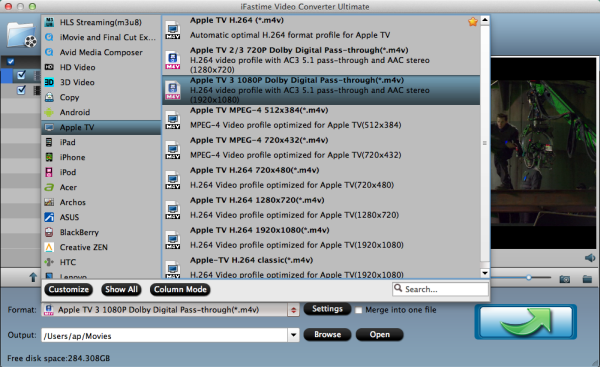
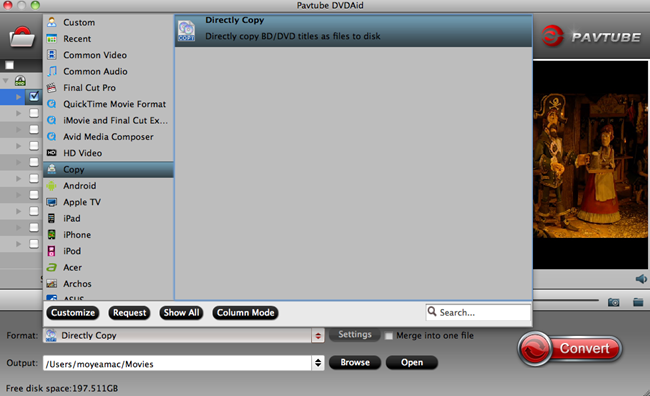
Click the format bar to follow “Copy” and “Directly copy”. Directly copy allows you to copy the main movie from your DVD disc without extras. If you want your converted DVD supported by more devices, take a try with other popular video formats suitable for your device. Please kindly note that Pavtube trial version only supports 6-time directly copy.
dvdaid for mac vob format

Step 3.Start DVD to VOB conversion

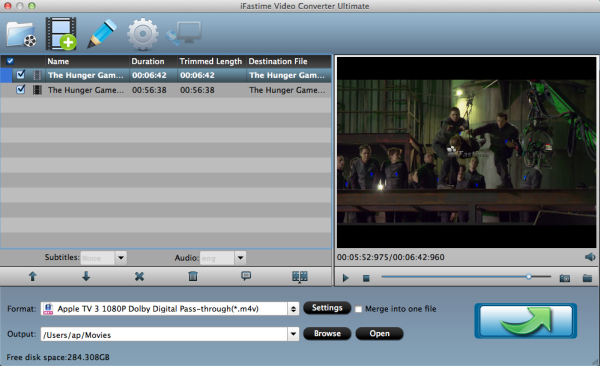
Click the red button “Convert” on the main interface to start conversion from DVD to VLC on Mac OS X El Capitan. It will pop up a conversion window indicating the conversion progress from DVD to VOB.
Both of the two method can achieve the process of DVD to VLC on Mac OS X El Capitan. Nevertheless, the latter method obviously is easier than the former one. and it has much faster DVD ripping speed than DVD ripping with VLC. What’s the most important, ripping DVD to VLC on Mac OS X El Capitan with VLC Alternative can reserve the original video quality. Now, you can smoothly enjoy DVD on VLC.
In addition: With Pavtube ByteCopy for Mac, you can backup DVD to multi-track MKV for VLC on Mac OS X El Capitan with subtitles and audio tracks well preserved.

Source:http://2d-3d-movie-tips.blogspot.com/2015/10/rip-dvd-to-vlc-on-el-capitan.html

Monday, September 21, 2015

Stream DVD to Roku 3 for playback

Roku 3 is the fastest, most powerful Roku player. Compared with Apple TV and Chromecast, Roku has many advantages. It enjoys more than 2,000 streaming channels offering access to 250,000+ movies and TV episodes, plus games, music, sports, and more, also can enjoy up to 1080P stunning HD video as well as Ethernet, USB, and microSD card ports. Despite of various merits, so far Roku 3 has no ability to play DVD-like sources. 

Officially, the Roku 3 only supports H.264 MKV/MP4/M4V video, meaning that’s the only media recognized over USB direct play. So, if you want to play DVD like Disney, Hollywood movies on HD TV via Roku 3, it is sensible to learn how to stream DVD to Roku with a professional and fast DVD ripper.

Luckily, there is an easy workaround to fix the issue. If you're interested in doing likewise, we have a great tutorial for you, guaranteed to play DVD movies on Roku 3 smoothly. Actually, it's not as difficult as you imagine, what you need is a just a top DVD Ripper like iFastime Video Converter Ultimate. It's easy to use for conversion and makes great quality copies of your DVDs. With it, you can convert your DVD movies to Roku 3 friendly format (H.264 MP4) for streaming to Roku 3 with fast encoding speed and high quality.

Hot search: Stream MP4 to Roku 3 | Watch Blu-ray on Cardboard via Roku | Five Best DVD Ripping Tools Review 

Free download the top DVD to Roku 3 Converter:


Other Download:
Rip DVD to Roku 3 friendly format without hassle

STEP 1. Import DVD movies

Install and run DVD to Roku 3 Converter first. Click "Load file(s)" to import DVD movie to the software. You can preview the movie in the right window and do a snapshot for your love scene here.


STEP 2. Select output format

Click "Format" bar and choose MP4 from "Common Video" as output format, which can be recognized by Roku easily. If your source video is in 1080p and you want to keep 1080p resolution as source movie, from “Format” you can choose HD Video > H.264 HD Video(*.mp4), or H.264 High Profile Video(*.mp4) for Roku 3.


If it’s a file type not supported, you won’t see it in the browser. Check out the media file type supported by Roku:

Video: MP4 / M4V, some MOV files and MKV
Music: AAC, MP3
Photo: JPG, PNG

Tips: There are also some optional tinkering you can take to make the videos look better on a HD TV screen, such as changing the aspect ratio or specifying the video resolution. Just click the Settings icon to do it. With the right settings you can also retain the quality of the original videos. This is particularly helpful when streaming over your network, depending on your network quality. 


STEP 3. Start DVD to Roku 3 Conversion

Finally, hit the "Start conversion" button at the bottom of the main interface. This DVD to Roku 3 Converter will start encoding DVD to Roku 3 friendly MP4 video automatically. After the conversion, click "Open" to quickly find the converted movies. Now you can stream the converted videos to Roku's SD card or to a USB drive that can be attached to Roku streaming player. 

How to Play Movies on Your Roku 3 from a USB Drive

1. Add the USB Media Browser to your Roku box. Log in to your Roku account on its website and click Yes, Add Channel.

2. You’ll get the usual Channel added to lineup message. It tells you it can take up to 24 hours to add it, but in my experience, the channels are added within minutes. Alternately, add it like you would any hidden channel. Enter the code KGULU.

3. On your Roku, go to the Home Screen and you’ll see the USB Media Browser has been added. If you want easier access to the USB Media Browser app, move it in the line up. Here you can browse through video, music and photo folders that are on your USB drive.

4. Browse to the media you want to view or listen to and start playing it. 

You can also use the Roku Media Player channel to listen to music or view photos from a USB drive. Play an entire folder of music files by pressing Play on the remote while on a folder, or nDVDgate to a specific track to play only that song. For photos, you can start a slideshow by pressing play while on a folder of photos.

Now you can enjoy DVD movies with Roku 3 with ease.

Additional Option to encode DVD to Roku MP4: Handbrake

Roku DVD issue is not hard to solve as long as you find the right tool. Free download DVD Roku 3 Converter to stream DVD files to Roku to watch or play DVD on Roku right now. Furthermore, iFastime Video Converter Ultimate can also convert Roku unsupported video files or audio formats like AC3, M4A, AIFF, FLAC, 3GA, RA, OGG, M4B, QCP, VOC, SHN, CAF, APE, AU, and etc to Roku 3 supported MP3, AAC and more.

Have more questions about how to stream DVD to Roku 3 for playback, please feel free to contact us>> or leave a message at Facebook.

More Topics:

Thursday, September 17, 2015

Play DVD ISO through Apple TV 4 on HD TV

The latest version of New Apple TV- the fourth generation, supports H.264 video in up to 1080p, 60 frames per second. The device also plays content from any Mac OS X, iOS device or Windows with AirPly or iTunes. The 4th generation also uses a new TvOS operating system, with an associated app store allowing download of third-party apps for video, audio, games, and other content. Do you have a lot of DVD ISO image files at hand? Ever thought of playing DVD ISO files through Apple TV 4 on HD TV with a wonderful experience with better visual enjoyment?


Working as a swiss army knife in DVD ripping field, iFastime Video Converter Ultimate for Mac removes the copy protection from your DVD and convert to Apple TV 4 friendly formats. Besides, it not only can work in DVD ISO, Blu-ray folder, Blu-ray ISO but also can convert Blu-ray and unsupported video to Apple TV 4 with high resolution, and then you can put them to on HD TV, or Smart TV, 3D TV, 4K TV, and more(Samsung TV, LG TV, Sony TV, Panasonic TV included). What’s more, this powerful app supports Mac OS X 10.11 El Capitan, Mac OS X 10.10 Yosemite, 10.9 Mavericks, 10.8 Mountain Lion, 10.7 Lion, 10.6 Snow Leopard, 10.5 Leopard. If you're using a Windows PC, please turn to iFastime Video Converter Ultimate, which has the same function as the Mac version. (read review).

Hot search: 
Blu-ray movies to Apple TV 4 |  How to stream AVI to Apple TV 4 |  4K H.265 to Apple TV 4  |  MP4 to Apple TV 3 

Free download the top Tivo Converter for Mac:


Other Download:

Rip DVD ISO to Apple TV 4 Suitable Format on Mac

Step 1. Load DVD ISO files

Run the program and click “Load file(s) > Load IFO/ISO” to add the ISO files. As you can see, you can also load DVD Folders and IFO files to rip.


Step 2. Choose output format and folder

Click on the dropdown menu of "Format" and then choose the format from the "Apple TV" sublist, which are all compatible for the Apple TV 3/4. 


Tip:

1. When you choose "Apple TV 3 Dolby Digital Pass-through (*.m4v)" as output, an AC-3 encoded audio track will also be included for Apple TV 4 to Pass-through Dolby Digital 5.1 sound (also know as AC3 5.1), so that it will work in surround sound when Apple TV 4 is connected to audio receiver, and in stereo when Apple TV 4 is connected with TV only. And note only when your movie has 5.1 channel, you will get the real 5.1 surround sound effect.

2.Generally, if you choose the optimized format for Apple TV 4 from the "Apple TV" file, you don't need to change the video and audio parameters again. But if you have special demand, you can click the "Settings" icon and go into a new interface named "Profile Settings". You can adjust codec, aspect ratio, bit rate, frame rate, sample rate and audio channel here.

Step 3. Rip DVD ISO to Apple TV 4 on Mac

Start the DVD ISO to Apple TV 4 conversion on Mac by clicking on the "Start conversion" button at the bottom right corner. After the short conversion, you will be able to get the output files for Apple TV 4 via clicking on "Open" button effortlessly.

Now you can sync DVD ISO on the new Apple TV 4 for enjoying with high quality. You should know, for streaming media from a Mac, iTunes must be 10.6 or later. And to get 5.1 sorround sound, AV Reciever is necessary.

Stream ripped DVD ISO on Apple TV 4 via AirPlay or iTunes:

Via AirPlay:

Firstly, to use AirPlay, you need to prepare one of the following devices: iPhone 4 (or later), iPad, iPad mini, or iPod touch (4th generation or later). Add the ripped DVD ISO movies to iTunes and sync to your iOS device.

Secondly, be sure iOS device and Apple TV are in the same Wi-Fi network; start play the video on your device, and then swipe up from the bottom of your device screen to access Control Center and tap AirPlay; 

Thirdly, tap the name of the device you want to AirPlay to.

Via iTunes:

Firstly, add the ripped DVD ISO videos to iTunes. Then, go to iTunes > Preferences, choose Apple TV, and make sure "Look for Apple TVs" is selected.

Secondly, on your Apple TV, choose Settings > Computers > "Connect to iTunes," and note the passcode displayed; in iTunes, select the Apple TV (below Devices), and enter the passcode.

Thirdly, click the Summary button and select one of "Automatic Sync" and "Custom Sync".

After all the operation, you should be able to Play DVD ISO through Apple TV 4 on HD/Smart/3D/4K/ TV freely. Just enjoy now!

Have more questions about how to play DVD ISO through Apple TV 4,  please feel free to contact us>> or leave a message at Facebook.

More Topics:


Tuesday, September 1, 2015

Backup Disney DVD to hard drive

Today, Disney has released so many classic animation movies, which has become a famous DVD movie releaser and publisher. If you're a movie fan, you maybe have collected a large of Disney movie owned for years, and want to copy these wonderful Disney DVD movies to hard drive for watching again and again. However, when you put Disney DVDs to your hard drive, maybe have some problems:

“I wanted to back up the Disney DVD Lion King I bought to my kid to prevent it, but unluckily, I failed. Some friend told me that's because this DVD was protected with Disney's x-project DRM.”

“I have maked a backup copy of a Disney movie I have owned for years. I was searching for a way to make a backup copy of these Disney movies. I have just begun to use a software. My first use was to make a playable DVD of this movie. I am interested in ripping to other formats however. Who can help me?”

As we know, because of Disney-copy protection, you can't do copying as easy as you think. Factually, you can avoid this problem by making backup and copy them to your hard drive to prevent them from being scratched, and manage them in a more convenient way. To solve this problem, you need to find powerful DVD copy software that can remove encryption to create Disney DVD backups, or convert to popular video formats for watching DVD movies on various devices.

According to our tests and Goole searches, iFastime Video Converter Ultimate can help you accomplish this task, which can backup Disney DVD movies effectively to hard drive. It uses the "Full Disc Copy" feature, you can preserve the DVD's original file structure, backup DVD disc to PC with simple clicks, and adopt "Directly Copy" feature, you can backup DVD main movie in original format (vob) without quality loss. What’s more, this powerful DVD ripper can also rip Disney DVD movies to hard drive in video formats like MP4, WMV, AVI, MOV, etc. (Read more review)

Hot search: Rip Redbox DVD Movies | DVD to Quicktime | DVD to Apple TV

Free Download or Purchase iFastime Video Converter Ultimate:


Other Download:

Guide to Backup/Convert Disney DVD movies

Step 1. Install the converter on your Windows/Mac. Launch it, and load your DVD movie from Disney DVD disc drive to the app.


Step 2. Backup DVD movies

Option 1. You can hit the “Copy the entire disc” icon on the main interface and start DVD backing up process. It enables you to makes 1:1 copy of original DVD Disc without quality loss with all audio streams, subtitle tracks, extras, etc.


Option 2. You can find the "Directly Copy" option to backup DVD main movie without extras. It will support to backup 100% intact the DVD main movie with all multiple tracks preserved.


Option 3. Alternatively, you are suggested to choose "Common Video -> H.264 High Profile Video(*.mp4) " for putting DVD to a hard drive for playback on various devices.


Step 3. Click big Convert button on the interface and then you will get a conversion dialogue box to show the exact progress, like time left, estimated size, state and so on.

Backing up Disney DVD movies to hard drive, hard disk drive (HDD) or thumb drive is so easy. Have a try now! You can enjoy your favorite Disney Copy-Protected DVD Discs with your family again and again.

Have more questions about how to backup Disney DVD to hard drive, please feel free to contact us>> or leave a message at Facebook.

More Topics: